Anodizing aluminum at home is one of those processes that feels almost magical the first time you do it. A dull gray piece of aluminum goes in, and a deep, vibrant, corrosion-resistant finish comes out. For hobbyists, prototype builders, and small product teams, DIY anodizing can be a cost-effective way to add both durability and visual appeal to parts.
That said, anodizing is still an electrochemical process involving acids and electricity. It’s not difficult, but it does demand preparation, patience, and respect for safety. This guide walks through the fundamentals so you can decide whether DIY anodizing makes sense for your project.
What Anodizing Actually Does
Aluminum naturally forms a thin oxide layer when exposed to air. Anodizing is essentially controlled oxidation. Instead of letting the surface oxidize randomly, you grow a uniform, thicker aluminum oxide layer using an acid bath and electrical current.
This oxide layer is:
- Harder than raw aluminum
- More corrosion-resistant
- Porous before sealing, which allows it to absorb dyes
- Electrically insulating
- Visually attractive, from matte silver to deep colors
For consumer products, enclosures, knobs, and mechanical parts, anodizing improves both function and perception of quality.
When DIY Anodizing Makes Sense
DIY anodizing is a good fit when:
- You are making small batches or prototypes
- Cosmetic finish matters
- You want color control
- Parts are relatively small and simple in geometry
It becomes less practical when:
- Parts are large or complex
- Tight tolerances are critical (oxide adds thickness)
- You need certified industrial coatings
- You lack proper ventilation or chemical handling space
For production or critical applications, professional anodizing shops still provide more consistency and certification.
Materials and Equipment Overview
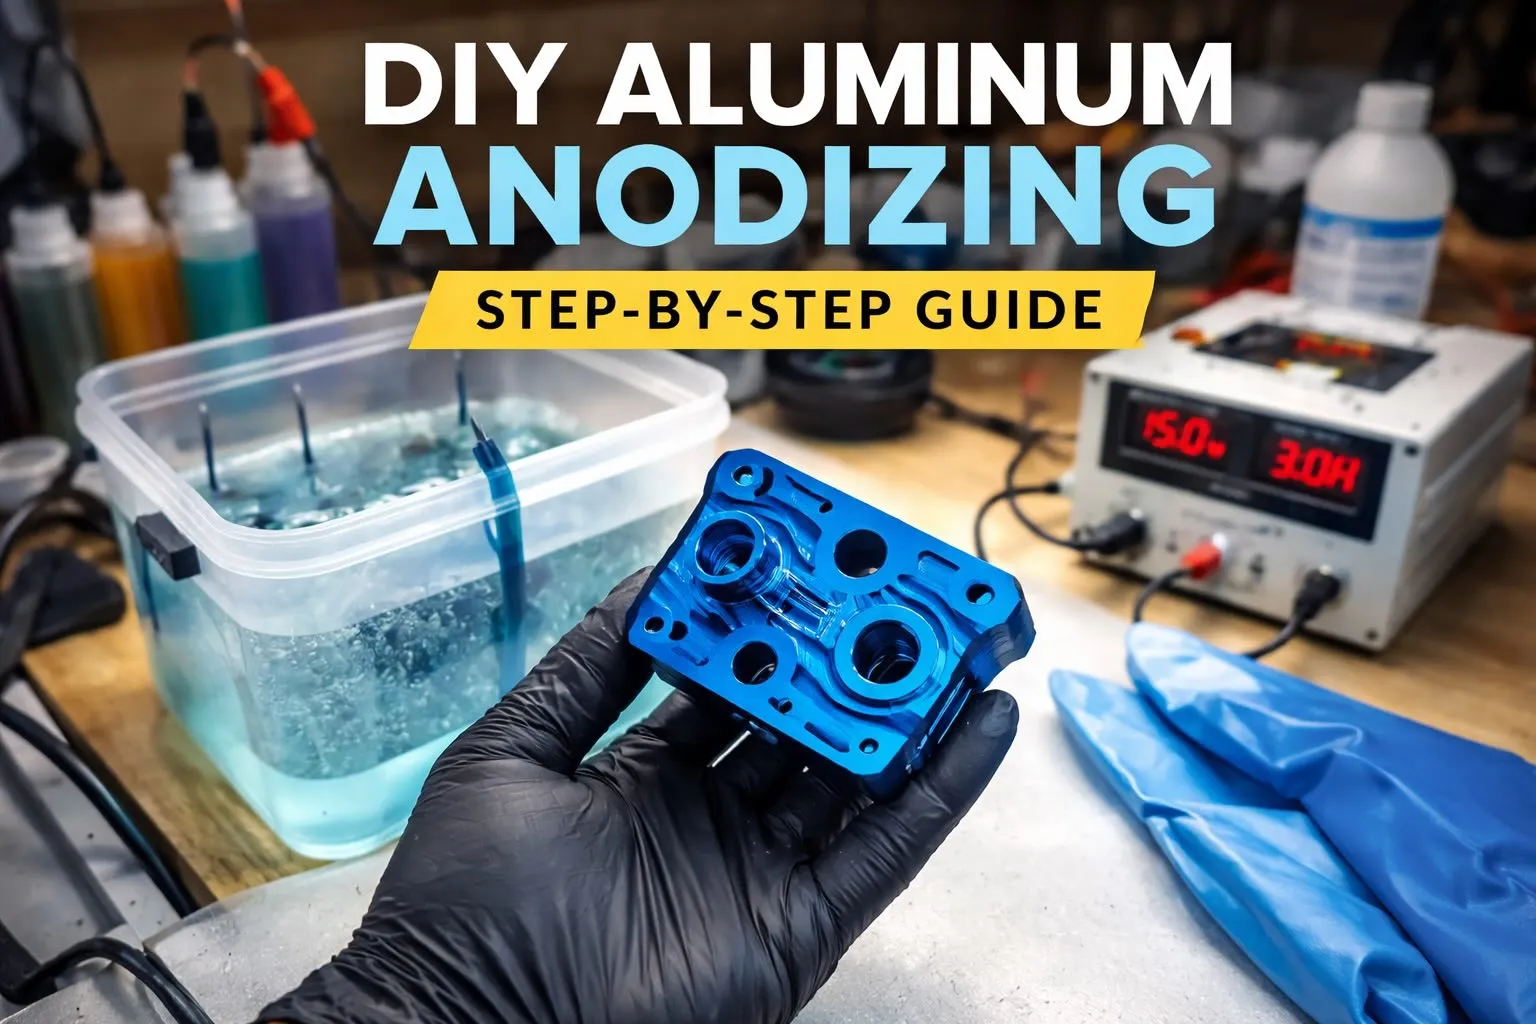
You do not need industrial machinery, but you do need the right setup.
Containers
- Plastic bins or HDPE buckets (never metal)
- Separate containers for cleaning, anodizing, dyeing, and sealing
Chemicals
- Sulfuric acid (commonly from battery acid, diluted)
- Distilled water
- Degreaser or detergent
- Dye (optional)
- Baking soda for neutralization
Electrical Components
- DC power supply (adjustable voltage/current preferred)
- Aluminum or lead cathode plates
- Aluminum wire or titanium wire for hanging parts
Safety Gear
- Chemical-resistant gloves
- Eye protection
- Respirator or strong ventilation
- Apron or old clothing
Ventilation is critical. A garage with open doors and a fan is far better than a closed indoor room.
Step-by-Step Process
1. Surface Preparation
Finish quality depends heavily on prep.
- Sand or polish to desired texture
- Remove scratches if you want a glossy look
- Degrease thoroughly — oils cause blotchy finishes
- Rinse with distilled water
Any imperfection left here will be locked in by the oxide layer.
2. Etching (Optional but Helpful)
A brief dip in a mild alkaline solution (like diluted lye) removes the natural oxide and evens out the surface, creating a consistent matte base. Rinse thoroughly afterward.
3. The Anodizing Bath
This is the core step.
- Fill a plastic container with diluted sulfuric acid and distilled water
- Place the cathode plates along the sides
- Suspend the aluminum part in the center using aluminum or titanium wire
- Connect positive (+) to the part and negative (–) to the cathode
Turn on the power supply. Bubbles will form — this is normal and indicates the reaction is happening.
Typical hobby settings:
- Voltage: 12–18 V
- Time: 30–60 minutes
Consistency matters more than raw voltage. Fluctuations lead to uneven coatings.
4. Dyeing (Optional)
Immediately after anodizing, the oxide layer is porous and ready to accept dye.
- Submerge in heated dye solution
- Agitate gently for even coloration
- Time controls depth of color
Skipping dye results in a natural silver or champagne finish.
5. Sealing
Sealing closes the pores and locks in color.
- Boiling distilled water is the simplest method
- Steam sealing is another option
Without sealing, dyed parts may fade or stain and corrosion resistance drops significantly.
Common Issues and How to Avoid Them
Blotchy Color
Usually caused by poor cleaning or inconsistent current.
Burn Marks
Too much current density. Lower power or increase cathode surface area.
Chalky Finish
Often due to improper sealing or contaminated bath.
Uneven Thickness
Part geometry and poor electrical contact are common causes.
Anodizing rewards repeatability. Measure, document, and adjust slowly.
Safety Considerations
This process involves acid, electricity, and heat. Treat it with the same seriousness as machining operations.
- Always add acid to water, never the reverse
- Keep baking soda nearby to neutralize spills
- Label all containers clearly
- Dispose of chemicals responsibly
- Never pour acid down household drains
A disciplined setup is safer and produces better results.
DIY vs. Professional Anodizing
DIY anodizing offers flexibility, fast turnaround, and creative control.
Professional anodizing offers certification, consistency, and scalability.
Many startups and engineers use DIY for early iterations, then transition to professional services once designs stabilize. If your part is customer-facing, high-volume, or tolerance-critical, outsourcing can save time and rework.
Final Thoughts
Anodizing bridges art and engineering — chemistry, electricity, materials science, and aesthetics in one workflow. Done well, it elevates a simple aluminum part into something intentional and durable.
For makers and small teams, it can be the difference between prototype and product. The key is respecting the process: clean preparation, stable electrical conditions, and careful sealing.
When consistency, certification, or scale become priorities, professional anodizing partners can take over. Until then, DIY anodizing remains a powerful tool in the modern builder’s toolkit.